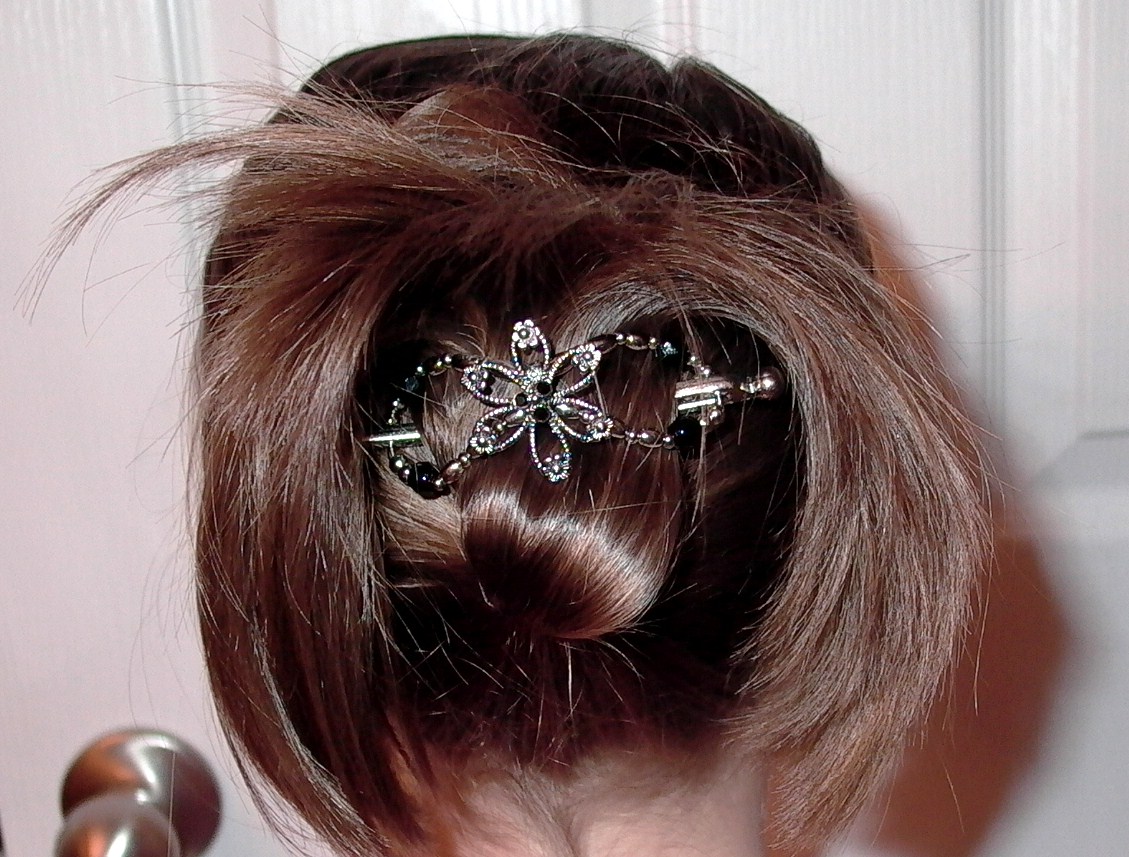
This is a GREAT little hair accessory that I received as a gift from Sarah Montee, an independent Lilla Rose consultant, and my gals and I love it! It's called a Flexi-Clip, and it's a new and improved version of the good old chopsticks style hair pins. And the best news about one of these is, you could win one of your own! We'll be giving away a gift certificate to the Flexi-Clip website. Details in my next post........
So first, check out how great, cute, and easy these hair clips are!
Here's some pics of some of the hairdo's we've tried:
Tails Up:
This pic shows how we used a ponytail first to secure her slippery hair.
Tails In:
Check out the video and don't forget to subscribe to my YouTube Channel to see all my Video Tutorials! (see button above!)
Showing posts with label updos. Show all posts
Monday, 21 November 2011
Wednesday, 27 October 2010
How to do girl's hairstyles: October's Creative Genius!
This month's Creative Genius shares an adorable Flower Fairy Hairdo, which I thought was so cute and just in time for Halloween!
Her name is Angela Jones, and if you are a regular visitor to my Facebook page, you will have seen one of the many fabulous hairdos she regularly posts there. I saw this one and knew this one was just perfect for those of you asking for Fairy hairdos for Halloween.
Thanks Angela! And the rest of you, feel free to share any pics of Halloween hairdos any of you have done this year, including this one or Rapunzel!
To start the Flower Fairy Hairdo:
Part hair into 2 ponytails & flip them under as seen.
Split top hair into 4 pieces & tie a loose knot in each.
Take the 4 pieces & add them together, at the top join them together using a bobby pin & pin them to the top of the scalp.
Because the knots are loose they can be moved & pinned into desired shape seen here.
Next, move onto the bottom ponytail, take sections & curl them using a curling iron.
Pin up each curled section as desired adding flowers as you go.
Pin the sections making your way up to the top so as to join the two ponytails.
After you have your curls sitting were you want, add the desired accessories, you can leave the sides or little curls hanging down if you like & we are done.
SOOOOOO cute! Thanks again Angela, and to the rest of you who sent in pictures! Keep them coming! I consider ALL I've received when picking out the next month's CG.
Happy Halloween! Be safe, be warm, and have fun!
Monday, 23 August 2010
Little Girl's Hairstyles - How to do a Puffy Braid Updo 10-15 Min
Well hi there..........I've been away for a while! It's been such a crazy last few weeks. My daughter started a new school, we've had family visiting, and I've just had other duties taking priority! But I hope to redeem myself and start posting regularly once again!
Here's a fun one that I saw on a little girl when we were at the library. I'm sure she thought I was odd as I kept glancing at her trying to 'understand' her hairdo so I could go home and do it myself!
Basically, this is just an upside down puffy braid, that starts at the base of her neck and travels up to a messy/stuffed bun up top. There is a front ponytail that will join the bun at the top as well. Begin by parting off the lowest ponytail section and clipping off the rest up top. Of course I do this with damp hair!
After doing this section, and the next section above it and putting them into puffy braids (shown below), I part off the top and frontmost ponytail, as pictured. In retrospect, I think I'd do a pull thru ponytail on the top, so it would lay flatter. Either works!
Then you are left with one last section, which is where you will join the bottom two puffy braid ponytails and the front ponytail.
Gather it tightly into a messy stuffed bun. If you want to watch the video on how I do this, go HERE.
Here's a pic of those nifty little bobby pins I love so much,
and how I'm using them to pin up sections of her stuffed bun to make it look more messy.
Voila!
Neat and tidy, cute and fast! Just how we like them!
Happy School Days moms and gals! Where did summer go!? My gal is already on her second week!
Friday, 6 August 2010
Little Girl's Hairstyles- How to do a Twist Braid Updo Video Tutorial
One of you fantastic ladies asked if I could do a video on an updo, and one that could be used at a wedding. Well, I hope this passes wedding muster! I've always been partial to hair piled up top with curls cascading down. Add in a ribbon and some baby's breath, and I think this will be fancy enough to throw out some rose petals!
I want to say a big THANK YOU to my sweet 7 year old too, she filmed this video for me! It was lengthy too (the filming), and she did pretty darn good I think (this will explain some of the bouncy bounce)! Thanks punkin!
AND, I apologize that the video is broken in two parts. You Tube did not like the length of my original, so I had to divide it.
One thing I wished I'd tried for video is this: Hot glue some little silk flowers on bobby pins and pin them around the ponytail up top. Match it to her dress! You can also use wide ribbon or even do 2 ribbons encircling her head.
Happy wedding day! Send us some pics!
Thursday, 24 June 2010
Little Girl's Hairstyles -How to do a 4 Strand Braid "Heidi" UpDo 10-15 min
So, do your girls ever run and hide when you pick up a comb or a brush? That's what's been happening at our house lately. Maybe it's because it's summer and they just want to go outside and run around madly in their swimsuits. Who can blame them? All I know is that my girls BEG for 'just ponytails, k?", or "just a braid, puh-leeze mom?"after I've coerced/bribed/threatened-to-shave-your-head them into the bathroom.
SO, in my undying devotion to you fellow bloggers who take the time to peek at us once in a while, I've posted this little 'just a ponytail/braid' do for you. And of course, we tried to make it a little fun, all the while keeping it out of the face, and allowing them to see clearly while running to and fro on the Slip-n-Slide. Plus I like calling it a "Heidi Hairdo". :)
For this hairstyle, I zig zagged her part from forehead to neck, and put her hair up in two high ponytails.
I then did a 4 strand braid in each ponytail.
Next, and there are a variety of ways you can do this, I just wrapped her ponytail around the other. Now, I get that many of your lovely darlings don't have hair as long as what's pictured here. There are still options! You can place the ponytails closer together, right next to the part. This will have more of a 'bun' effect. You can also just join the braid's ends together in the middle with an elastic. But since my available model has this length of hair, here's what you can do as well.
With the second braid, I tried to layer it as I wrapped it around. Wrap it pretty much however it's going to lay best, and the tightest. I've done it two different ways in my pictures. I did it this way, shown below, and then it's different in the pics shown where she's wearing the flower. I tried to make a figure 8 with the braids.
Bring the ends together underneath and join them.
If you have long ends still at this point, tuck them under the braids, and place them where you'll be able to secure them with a bobby pin.
Secure the braids and ends with a bobby pin, using at least 2 on each side.
If your braid is standing up from the base, like the one on the left in the below picture, push it down so it lays flat, and keep securing the braids wherever necessary.
I stuck in a flower right on top of where the braids joined together underneath (big flowers are super for hiding things). And Voila! She's ready to go! (You may want to remove the flower for slip-n-slide fun though).
Doesn't hurt to be cute while you are having fun, right?
Monday, 11 January 2010
Little Girl's Hairstyles -Pull Through Pony Updo 10-15 Min
Here's one of those Christmas break updo's that mom did when it was just too darn cold to go outside and play. I'm not sure why all the different colored elastics and non matching flower, BUT, let's just say at the time, it worked. So here we go:
Part the hair at an angle from front to back.
On the right side, section off a small area and do your first pull through pony.
Next, section off a larger area on opposite side of your part, and do another pull through, angling it toward the part.
Part off section no. 2 on the right side, and incorporate the pony from the left side into this pull through.
Make section no. 2 on the left side, crossing over the first pull through's pony, over the top of the first crossover, and incorporate it into the next pull through, angling toward the part. (Pictures are SO necessary--because I don't think my explanations would make any sense otherwise!)
Make a 3rd section on the right side again, pulling in the existing pony on the left, but cross it over the top of the right pony this time, instead of under.
Grab both ponys and the rest of the hair that's still down and comb over and put into a bun (I did a stuffed bun).
Spray well with hairspray, and then this is when I stuck in my large non matching flower.
I include all the side and top shots to hopefully help you see what it looks like (and should look like) from all sides. If you are like me, I usually need to adjust at least one thing on one side to get it right. I hope this is another helpful updo for you ladies requesting those! It stays in tight, and out of her face. This is a great one to use those handy seam rippers to get the elastics out!
Happy Monday!
Subscribe to:
Posts (Atom)


