Wednesday, 23 September 2009

Little Girl's Hairstyles -The Quad 15-20 min

This idea....like so many others, started out as something else. Then I got stumped. My husband, seeing my dilemma, offered an oh-so-timid suggestion. I thought, "what the heck", and tried it out, and voila! Sometimes it works, sometimes it's a quick ponytail day. Luckily for me, this one turned out nicely (especially since I was in a NOT so nice mood already. Another story for another time.Good hair = nicer mommy).
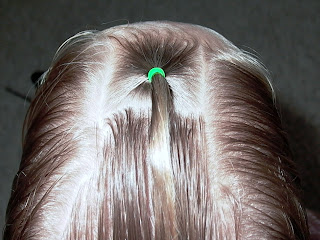
Start with the usual super soaked head. Part off front section to middle of ears like so.
I did an inside out braid (of course) just in the middle of the section, and braided down as far as I could.
I did the same on the other side, and pulled them together low in the back. Pull them tight when securing them with the elastic.
Next, I flipped those braids back over her face (oh they love that), and parted the rest down the middle. To begin the french braid, I parted off a small section on an angle, since I wanted this to angle down around the curve of her head, and not just straight down (thus showing off the joined braids more).
French braid down a little past her head, and secure with pony. I flipped back over the joined braids for the full effect here.
Do a matching french braid on the other side.
Braid down past her hairline again (this helps keep those little neck hairs from being pulled on when you slap it all together).
Use your third hand, and pull them all together.If you are feeling adventurous, you could braid the tail of the joined braids down past the elastic......but like I said, my mood was not an adventurous one at the time.
Pull it all in nicely, and then I braided the bottom portion. If the hair isn't long enough, then you can skip this part and leave it in a pony.
And Kapow! I was secretly thrilled on my insides with how cute it turned out. I love when I can admire my work all day long. Which is what I did with this one. It was just that cute.
See? She knows Mom is happy at this point.

Want to know the best part about this hair style? It turned out to be a two day do. It stayed in well through the night, and in the morning, I undid all the braids, pulled the two front sections into little ponys. Because these two smaller sections were way more kinky than the rest, I just pulled them back into a low pony, like they were in the joined braids, and stuck a bow in it. It was marvelous for church. Fast and lovely.

Little Girl's Hairstyles -"A" puffy braids with stuffed buns 7-10 min

So now that I've started this blog, I notice that whenever I shut my eyes, I see hair. Hair this way, hair that way. And for some funny reason, I keep seeing puffy braids in the shapes of letters. Maybe it's because I'm doing preschool at home with this little one, and we are learning how to write the alphabet. So, here we have it. My attempt at the letter A. Maybe I'll try all 26!
Start with wet hair and parted in a small square about 1 1/2 inches all the way around.
This is just to show the next section of hair that I parted off, another larger square.
Divide that section down the middle and part existing pony in half and split between the two new ponys.
Next, part another larger square on one side, as shown, and pull top pony in. Next, part a middle square, like the very first square, and pull half of previous pony in.
Finish with completing the last square, as shown, pulling half of middle pony in, and the pony above it.
Split remaining hair down the center, and pull two remaining halves of bottom ponys into a stuffed bun (see how to do a stuffed bun).  If her hair is long enough, like my girl's here, just keep stuffing second half in and adjusting hair so it doesn't look like just two halves, but more messy and unprecise. I will stuff in with one finger and then another, sorta like typing. :)
On the other side, do the same thing. Here I wasn't happy with how my 'stuffing' turned out, so here's a fix:
Adjust the hair so it's more rounded and even, and then slip a clear elastic around it, and if necessary, you can stuff more hair into that.
I like it looking more 'piecey' rather than two big folds.
Stick in some pretty bows....give it a good spritz of the 'spray....
And it's "A" winner! Okay...so it's more of a triangle. We'll have to manage.
This top part would also work great for shorter hair. You can skip the bun part and just make little ponys.

Friday, 18 September 2009

Little Girl's Hairstyles -Slide up (or squished) braids with twist braids 10-15 min

I didn't make up these cute slide up braids, but I love them because they are really unique. You have to be creative in how you use them, due to the long ends that hang out, so this is my favorite way of incorporating them.
I do two ponys off a center part, hair thoroughly soaked.
Loosely braid the pony down to the ends.
Pull off two strands to the right, holding tightly to the one remaining. Make sure the one you hold onto is long enough to keep a good grip on.
Holding tightly to the one piece, start working the braid up the strand, keeping everything tight.
When it gets hard to move the hair, just work a squished section farther up, and continue.
This is about how much I get out of her length of hair. But it's super cute! Put in your elastic when it's all the way to the top.
Both sides done. Part the rest of hair down the center.
Pull squished braid into ponytail.
I did two twist braids down the rest of her hair.
For a twist braid, part the section you want into two sections, and thoroughly wet hair.
Start twisting both pieces in the same direction, and then start wrapping around each other in opposite direction at the same time. See my other twist braid posts for more pics.
Stick in some cute bows (I made these) and you are done!
Here's another version I did on my other daughter. I just did a ponytail with a bunch of squished braids. Her hair is curly, so the ends curled by themselves and looked ok left like that. And yes. We were bowling, and I was busying myself taking pictures of my girls' hairdos. Typical.

Little Girl's Hairstyles -Side pony with twist braids 20-30 min

I saw a version of this on a little girl, and I tried to recreate it. I'll never know how well I matched up, but I thought it turned out pretty ok! She slept in this (her idea!) and it still looked so good the next day, we left it in. So think on that when you start doing this and realize it's a little more time consuming than most. But beauty takes time, right!?
I started by parting off the bottom 3rd section of wet hair and clipping up the rest.
Divide bottom into 3 ponys.
Divide top 2/3rds in half
and then again into fourths.
Do a twist braid on the first pony on the bottom. Secure it, and then comb up first section on left to get it ready for a pony tail.
Then bring up twist braid into pony.
Continue this over, bringing first pony over into second set.
This is how I secured my twist braids.Make sure to sink the clip teeth into the braid.  I had my daughter hold it once, but she grew tired of doing that pretty darn quick.
When you bring up the twist braid, first I comb up the pony, then bring over the adjacent pony
and then add in the twist braid.
Continue over to the end, ending in a pony. I dried her pony,and then did corkscrew curls in the pony.
And I added some ribbon!
GORGEOUS!

Bowlicious Bowtique

Need some bling to complement that new hair style you have been working on? This super cute store has offered my readers a 15% discount on their products. http://bowliciousbowtique.blogspot.com/. Email them prior to ordering and mention my blog. Happy shopping!! bowliciousbowtique@gmail.com.