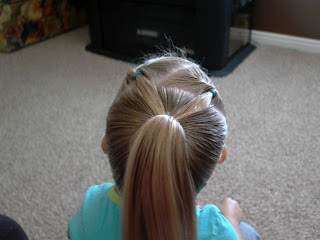
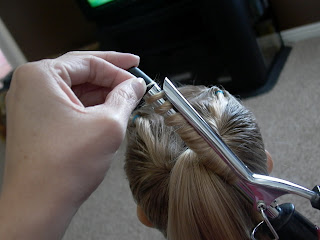
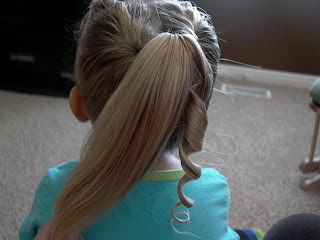
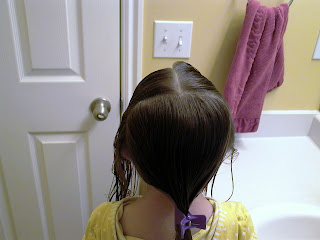
This is a result of another hair style falling out. I was hurriedly trying to just remedy the mess, and get the hair out of the face, but....it seemed to end up nicely. I did a quick stuffed bun (see label), and used two bobby pins (left over from hair style no. 1), and just grabbed some hunks of the bun, and pinned some sections back and down into the ponytail, creating a flower bun or messy bun, as they are called. It was quick, easy, and D-A-R-L-I-N-G!
Wednesday, 9 September 2009
Little Girl's Hairstyles -French Braids 7-10 min
Here's just some ideas on what you can do with a basic french braid. These are regular french braids, angling down from her center part. Just part off each section, clip the back out of the way, and get braiding!
Sorry for the dark picture. :( If you enlarge the picture, the detail is much better.
I also took these pictures after she got home from school. I was happy with how well the french braids stayed in.
This is your basic run of the mill french braid down the back of the head. A classic, but always a crowd pleaser.
Little Girl's Hairstyles -Double twist braids with soft tousled waves 3-5 min
This is what I did with her hair the day after I did the corkscrew curls with the pull through ponys (see post).
We like to call this her mermaid hair, so she sported her Ariel swimsuit for the occasion.
Back view (post-Ariel). I don't think the pictures do these soft tousled waves justice. They look D-A-R-L-I-N-G.
Top view of what the twists will look like.
To start, I used the same part from the pull through ponys, and finger combed it down, since I didn't want to pull out the curls.
I parted off two ponys, like this, leaving one small. This will be for your twist braids. I also sprayed hairspray on the pieces before I combed them into ponys, to smooth up the little baby hairs.
I did twist braids on both ponys, securing them down with a bobby pin until I was ready to join them in the other pony. See the label 'twist braid' to learn how to do these. Since the hair was dry, and harder to handle than when it's wet, I sprayed each section again with hairspray to make them stay in place as I was twisting the braids.
I parted off the rest of the larger side, and pulled in the two twist braids.
With a bow
Beautiful soft tousled waves! ( I don't know what's up with the color in these pictures--like I've said, I'm NOT a photographer.)
Here's another super fast option after sleeping in the corkscrew curls. Smooth down from the initial part, spray with a little hairspray, and stick in a headband. This is always her first choice for a hair style!
Little Girl's Hairstyles -Pull Thru Ponys with Corkscrew Curls 15-20 min
If you do this hairstyle today.......
You'll have this hair tomorrow. (Enlarge this one to see it better!)
Since you'll be curling the hair, don't get it all wet. I only sprayed the front, where it's parted on an angle.
I parted down to the ear, and then gathered one side in a pony. To do a pull through pony, stick the end of a rattail comb through, and wiggle it back and forth to make a large hole in the pony.
Bring hair through, wrapping it over, going towards her face. Bring it to this point, and then to tighten it down close to the head, I split the pony and pull down and apart.
Do two pull through ponys.
Comb back the rest of the hair, and pull into a high pony.
You are going to do another pull through pony with the large one, this time pulling it in the opposite direction.
Use your rattail comb to make another gap, and pull the hair up through the gap, and over.
It gives it that nice poof on top. Tighten it up the same way.
To begin the corkscrew curl, I used sections about this size. I used the 1/2 inch curling iron, since her hair is pretty straight, and I wanted maximum curl. I sprayed the section of hair first with hairspray, and smoothed it down with my hand.
Start by wrapping the hair around the barrel, all the way to the ends, and hold with your hand. When I get to the last 4 or 5 inches of hair, I start twisting the hair as I go around. You can see the difference in how it's laying on the barrel. You can do that to the whole section, especially if it's shorter. I hold it here with my fingers for about 30 seconds. *If you see steam coming off the curl, it's most likely the hairspray burning, and not to worry. On the other hand, if you smell something not right, it's time to lose the iron.
This is what it should look like when you are done. See the difference on this than from the 'not so perfect curls' post? This will end up leaving the ends more straight, and you'll achieve that soft tousled wave look.
This shows where I start twisting the hair at the end on the barrel.
All corkscrew curls finished. Give it a good coating of the 'spray.
See all those nice creases? Here's what I do to fix that so the ribbon doesn't look so hammered.
Just run your curling iron up and down it until it's smooth. You can also curl your ribbon just like you curled her hair, if you so choose. I chose not today.
All nice and tidy.
She's not in the corner because she's in trouble. It seemed to help her keep still today for pictures for some reason.
Front
Whenever I do this style on my girls, I always try to have them sleep in it, ponys and all. The next day I take it all out and it will look (usually) like the soft tousled waves that are so popular today. I love love love it the next day. See the post labeled Double twist braid with soft tousled waves to see what I did the next day. Also, I don't finger comb out the curls until the next day, and then, just very lightly.
Little Girl's Hairstyles -2 French braids with a stuffed bun 7-10 min
Let me just start this post with an apology for my pictures. I am most definitely NOT an expert in photograpy, so my pictures on this hair style were not the best. However, I am going to be posting a video on how to french braid soon. I just need to find the right cord....... I did attempt to show a basic instruction on french braiding here, so bear with me. Hopefully you'll get something (!!) out of this one. :)
I started with a wet head, and I did put some of my handy oh so generic gel in her hair. TIP* When putting in the gel, just get a small amount and rub it in your hands, and then distribute from the roots down. Comb it through well, so you don't end up with any sticky white areas.* I parted the hair in 3 sections, and clipped the back out of the way.
I part off a small section and comb it out, and part into 3. Don't worry about the sections being too equal, since you will be adding hair into it.
I am doing an inside out braid here, and so I bring the first piece under.
Bring across the piece from the left.

And bring across the piece from the right again. This is when you can start adding in hair.
This photo is a sad sad attempt to show you the hair I brought up from the right side and added into the piece I was holding.
Continue adding in pieces down to where the hair is parted off.
When I get to this point (and periodically) I comb out the pieces of hair I'm holding to smooth it out and keep it from getting tangled.
Braid until end of hair. Secure with elastic to hold.
Do same thing on other side.
After finishing both french braids, lay them off to the side, and comb out back to put into a pony.
Bring braids in and lay on top. My poor little crumb had to cough.
Put in pony, and pull through halfway for a stuffed bun. See my post for stuffed bun.
I wish this picture was better, but hopefully you can see what it looks like. Also, I am sorry if these pictures are always crazy and off centered. I've tried getting them straight. Twice. I'm done. I like to do hair, not live on the computer.
Back view with flower clipped in.
Front view. FYI--I did this one before school no less! It really is a fast and easy one.
Subscribe to:
Comments (Atom)


