Showing posts with label daisy chain braid. Show all posts

Monday, 10 January 2011

Little Girl's Hairstyles- Blast from the past: Daisy Chain Braid or Knotted Braid

Hi Friends! I get a lot of questions from readers about certain ideas or hairdos, and so much of the time, I've done a hairdo in the past that would be perfect for them. SO, every now and then, I'm going to bring 'round a "Blast from the past" and showcase some of my older posts, just to remind and refresh us on some past ideas!
This one has been a big hit, since I posted it over a year ago, and someone mentioned it and asked about it recently, so I chose this as my first "Blast".
I nicknamed it the Daisy Chain Braid, but it's just a knotted braid. We love it, and the gals love the compliments they get when they have it in!


Here's the VIDEO for the Daisy Chain Braid!


 Tell me what you think!! Have a great one!

Wednesday, 25 August 2010

Little Girl's Hairstyles - How to do hair for School Pics!

I don't know about the rest of you, but School Picture Day is probably one of my most stressful mornings (pathetic, I know). I stress because:
1: I can't be there to rearrange, comb, spritz anything back into place, and 
2: how do I get the hair to STICK, look natural, but not move until it's picture time?
I justify my erratic and tense behavior because, as I tell my girls, "I'm paying for these, so I want them to be PERFECT." So, now that you are feeling sorry for my children, let me share with you some possible ideas, that I think would be SUPERB for picture day.

I really really like my girls' hair down for pictures. I think that if I'm going to do something fancy, it should be visible, and since most of my fancy stuff is in the BACK of the head, it does nothing for their pictures, which I really want to show off their cute little faces. So, here's some of my favorites, with the hair down, that I think we'll be choosing from, since our picture day is tomorrow!
But, I know some of you may want to have the hair up, so I've picked a few faves for you too. They are at the end. Enjoy! Good luck with your morning!
Hair Down
Rosettes/Twist Bun Headband  (I will be sharing a video on how to make the actual headbands soon!)

Hair Up
If you wanted to eliminate the top twists, I think a side bun with a flower would be adorable for pictures as well. I'm leaning towards this hairdo myself.....

Wednesday, 14 July 2010

Little Girl's Hairstyles - How to do different hairdo's with a Daisy Chain Braid! 15-20 min each

So on the days when I decide to 'do some hair' I realize the pressure I've put on myself by creating this blog! I'm forever trying to create a new hairdo to teach or show, to give you ladies the ideas you want. And don't get me wrong, I LOVE playing around with new hairstyles, braids, ways of twisting the hair, etc. I am always striving to create something cute and different, but that doesn't take an hour and a half to do, and requires 7 hands! So, most of the time I attempt variety by combining hair tricks/styles I've already shared. We all know there are literally thousands of things you can do with hair, but half the battle (for me anyway) is SEEING something really awesome and saying to yourself, "hey, I can do that!"
So, here's two I did the other day, using braids I've shared previously, and therefore, braids and tricks that you all are already pros at!

For this hairstyle, I first did a side part, then did an angle part on the large side, from one temple back to above her other ear. Next I did two small Daisy Chain braids back to the same point, and ponytailed them off.
I then combed the rest of her hair into a side ponytail, and included the braid's ponytails, and put it in a stuffed bun on the side.
For this hairstyle, I did an angle part in front, dividing all the hair in front in half, and did two small Daisy Chain Braids back to ears, and ponytailed them off. Then I pulled the rest of the hair back into a ponytail, and did a 4 strand braid in her ponytail.
This one was not a happy camper about having her pictures taken. Having cute hair does not equal having a cute attitude!

I hope these inspire you! I'd love to see what you come up with using the Daisy Chain Braid!

Wednesday, 10 February 2010

Little Girl's Hairstyles - Daisy Chain Braid with a WAVER 10-15 Min

Here's a zippy and cute do that is doable before school! I did it one morning AND took pictures, and got her on the bus. Sorry abut the bluish tint to my pictures here. My bathroom lights stink for picture taking. But the show must go on...
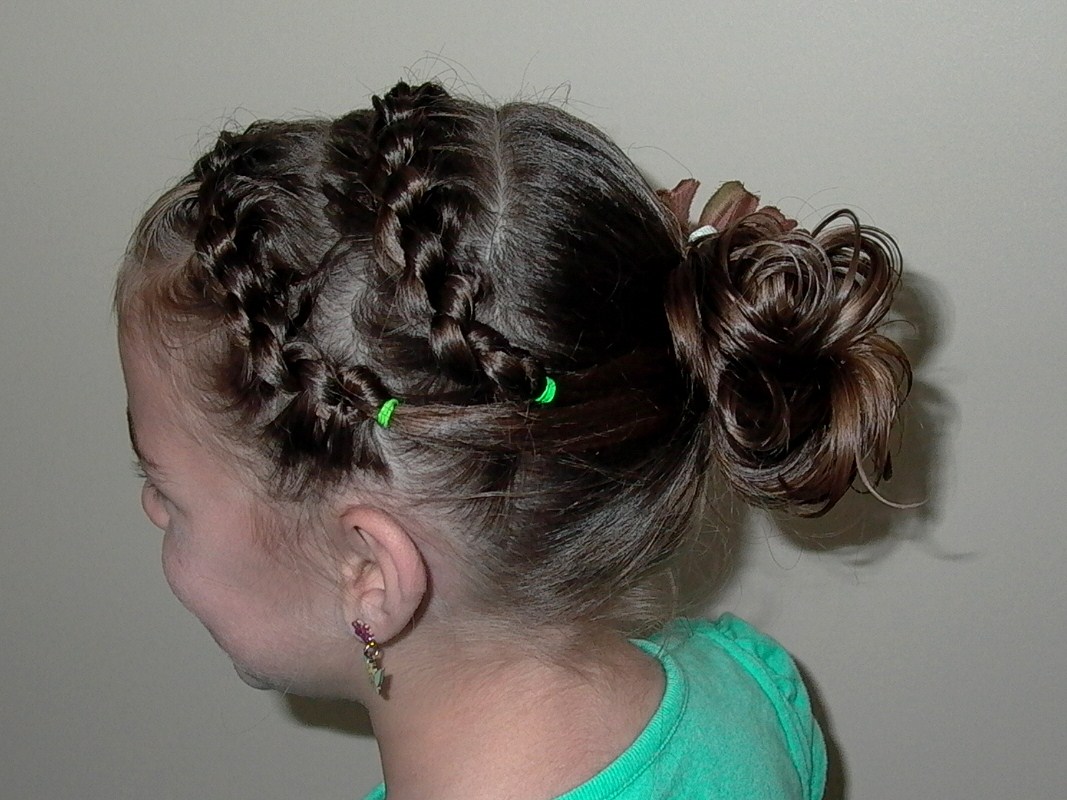
For this fun and fancy one, I started with a side part back to her crown.
I then angle parted the larger section, and clipped off the middle area. I did spritz these little sections with water before I began my braid.
I did a daisy chain braid down to her ear and put in an elastic.
I did another braid in the middle section, angling towards the same direction as the first.
And then, I got out my WAVER. And yes,  I LOVE it! I found this one in a clearance bin at Ross, and you would have thought I'd found a $100 bill buried in that bin. You see, long ago I had ye old crimping iron (1980 called and wanted it back), and I have since yard saled or DI'ed it, and have regretted it ever since. I didn't love the crimpled look, but I just loved the idea of the crimper. Nice, evenly distributed waves, not induced by an hour and a half of braiding. I've searched high and low for one that I liked (I don't like, I repeat, I don't like using the 3 barrel thingamajig) and was easy to use. SO, I'm telling you all this so that when the day comes and you find your waver buried in a bin, you will be as happy as I was! They are FABULOUS! Here's what Bessie (this is what I've named her since she's so beloved now) looks like:
See the nice deep waves? And it has temperature settings so you adjust it according to the type of hair you are using it on.
To begin waving I parted off her hair into small  sections. I comb the hair out first, and lightly mist that section with hairspray, comb again, and then pick up my first piece to wave.
This waver gets extremely hot, so to protect her little noggin, I place the comb right next to her head when I use the waver up close.
Do each piece evenly, and always spray with hairspray before. This will help keep it in throughout the day. When you have waved all her hair, very lightly comb through from underneath, and only if necessary. If you've combed the piece out beforehand, it shouldn't need much.
And voila!


Monday, 4 January 2010

Little Girl's Hairstyles -How to do a Daisy Chain Braid Video Tutorial

This one is a tad overdue. I posted pictures a while ago on how to do this braid. It looks like this:


Have a great time daisy chaining hair today!!


Wednesday, 21 October 2009

Little Girl's Hairstyles -The Daisy Chain Braid 20-30 min

I am not sure if there actually is another real name for this braid, because I looked all over Google, and didn't find anything else, so I guess I get to be original here. It's actually a series of knots, instead of braiding, and I just liked the sound of Daisy Chain for this. All girly and flowers work for me!

And, I WILL be posting a video of this one. Sometime. Soon.
There's that cute bow again from Madibu Bows!
I did two here, but of course you can do just one, which saves you a bunch of time. I do prefer the smaller chain braid myself, which is why I am showing it in two. Begin with one side, other side clipped off. I did do it with wet hair here.
Take your usual section , just like when you start a french braid, and divide into two pieces.
Tie a knot and pull it down tightly. I have done the knots in all different ways, and it all ends up looking the same. The important thing is to be consistent in how you tie them, always putting the same side over/on top.
After you tie the first knot, take sections from BOTH sides, one side at a time, and add them to your existing sides of the knot. Then just tie another knot. Continue to add pieces from both sides and then tie, keeping it tight. It also helps to comb out the hair frequently, and keep it wet, to keep the small hairs from sticking up when you knot the hair.
This is showing how I've added in the hair from both sides, and am tying another knot.
Folding over the hair, and pulling it through.
I tied off the braid once I reached this point, as it is harder to knot the rest of the hair, even with hair her length.
Both sides finished.