Friday, 26 February 2010

Little Girl's Hairstyles - French Braid into Wrapped Ponytail 10-15 Min

So, if you come and hang out here looking at little girl's hairstyles, then we share something in common. We like cute hair on these little girls! Well, I love looking at other hair blogs and seeing their creative genius and admiring their handiwork. It's amazing what some of these gals can do! Right? Right. Well, like some of you too, I am a mom. A busy mom who has things to do, and most of the time it does not involve a lot of time to do fancy hair. Alas.....I share with you practical, cute, easy and fast hairstyles--most of the time. Right? Right.

Take example A below.

This is a real life, real time hairstyle that we favor quite often in my house. Ponytails are often requested, and since I cringe at doing JUST a ponytail, I have to dress it up a bit. So here's our dressed up ponytail:

Start with semi damp hair in front, parted off to the side of the face. A good rule of thumb for a side part is to start the part in line with the center of the eye, and pull back to the crown.  I like to spray the parted hair with water and comb down both sides of part to keep it smooth.
Do a french braid on the larger side, angling it straight down to the ear, and continue the braid to the ends of the hair.
Comb the rest of the hair straight back into a ponytail, bringing in the french braid on the side. I spray all around the head where I'm combing in the hair, as the water will make it lay smooth and stay in longer.
To make the wrap around the ponytail, take a section of hair from underneath. I like to take a fairly thick piece of hair, to cover the elastic nicely.
Wrap the piece around the elastic and the french braid piece of hair until you come to the ends.
At this point, wrap the hair ends in, and grab your clear elastic.
Wrap your clear elastic around the ponytail, making sure to tuck in the ends of the wrapped section. When it's secured, take the elastic out of your french braid and smooth that section into the rest of the ponytail.
This hairstyle was featured in my Christmas hairbow section, showing off these cuties from Lil Cutie Hairbows.
With a little hip action as well.
If you are ambitious, and the ends of the ponytail need some help, curl it with your curling iron, or round brush it, or wet it down (if she has some natural curl) and wrap it around your finger and spray with hairspray.  Or do what your conscience dictates (or if you are like me, what the clock dictates!).


Little Girl's Hairstyles - Thanks for the awards gals!

I just wanted to say a big thanks to these lovely ladies who thought of my little blog and shared awards with me recently!

Curly Q's Hairdos who gave me the:


I will give this one back to the following:


and Tammy's Two Cents gave me the:


Thanks ladies!!
So here's me returning the favor to 12 others......

I am passing on the Sunshine Award to...
Madibu Bows

Happy Blogging to all of you!
 

Tuesday, 23 February 2010

Little Girl's Hairstyles - How to do a Side Twist Video Tutorial

This is a hairstyle that I do frequently on my gals. It's fast, and usually cooperates with me. It's also one that seems to draw a lot of comments when we are out and about.....so hopefully this video will be of some value to you! Also, I really and truly promise I do NOT give my children lollipops ALL the time. In fact I usually confiscate them when they bring them home from wherever. Because I have to have them. For later. When we do videos. :)


Friday, 19 February 2010

Little Girl's Hairstyles - Ponytails with twist braid 5-7 min

When I ask my little gal here what hairstyle she wants in the morning, she almost always says, "Just a ponytail.......puh-leeze??" And believe it or not......I don't always want to do fancy schmancy hair. SO, here's a little girl's hairstyle that's cute, easy, FAST, and it pleases my little sweetie.
For this one I did an angle part in the front, and then zig zagged it in the back. When I part off for ponytails like this, where all the hair will be involved, I always spray the parts with water, and comb the hair away from the part. This helps me from combing the hair into the wrong side.       
After putting her hair in ponytails, I took about a third of her ponytail, from the front of the pony, and put it in a twist braid. If your daughter's hair isn't naturally straight, you can straighten it or roundbrush it, if you prefer (or just leave it wavy!) The point with this hairstyle is to minimize time! When you are done, send those beauties off with a pat and say "Go forth and play!" :)

Wednesday, 17 February 2010

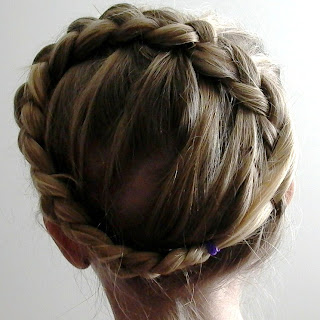
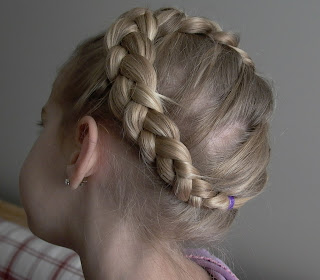
Little Girl's Hairstyles - Wrap Around the head French Braid 7-10 min

Here's an oldie! I remember seeing 'versions' of this french braid from years ago, but it usually was started at the base of the neck and headed straight up from there. This one involved having my gal laying on her tummy off our big ottoman too, but I wrapped it around instead of having the braid end up top and hang in her face.
I also don't have pics of her hanging over the ottoman, but you can see where I started the braid, behind her ear. Comb all the hair in the direction you want the braid to go first, and start your french braid ( I did an inside out braid here). You also want to bring hair up from the neck up, gathering all the hair into the braid in just the top section of her braid, or the section that goes over her crown. Once you get to her ear on the other side, have her sit up! :)
In the above picture: After I'd braided across the top crown section of her hair, ending above her other ear, and after I had gathered all the hair in, I finished by doing a regular braid until the end of the hair.
Wrap the braid around the bottom of her head, and if the hair is long enough, you can try to tuck them into the beginning of the braid. I secured it with a large bobby pin.
This is where a large flower comes in handy. Place it between the elastic and next to the bobby pin to hide the ends. I didn't have one handy here, but you can clearly see what needs to be covered.
Sorry I didn't have the other pictures! Sometimes I try stuff and don't think I'll get it, but this one I did......but didn't have the pics to back it up! :) Let me know if anything is not clear, and I'll try to amend my mistakes!


Saturday, 13 February 2010

Little Girl's Hairstyles - Valentine's Day Dos! 10-15 min

Valentine's Day Hairstyles!!
I had a most lovely email from a reader who sent me her cute Valentine's hairstyle! Look at this:
Here's what Jo said: i love your site ! here's one u can try & have been doing this to my girl for about 10 years... this pic is the next door neighbor's lil girl i just did b4 school today (v-day party today at school) did my girl too but her pic wasn't as clear & her hair is longer wanted to show it works on shorter hair too... thanks for all the ideas & hope u enjoy this one... the part is the key btw... & i only pull from the top so the braid floats a lil... peace
Thanks a million Jo!! She did such a great job on this hairstyle!!

Here's my submission to the land of hearts and cupids! Start off with a small zig zag part to the crown, and make two hig ponys.
Put in two twist braids on each side.
Join the two twist braids closest to the center in the middle of her head.
Next, join the two outside twist braids down low on her head, forming your heart. You can do this with regular braids, fish tail braids, whatever you want to do.
I used my wave iron on the rest of her head, and stuck in this gorgeous bow from Flowerz In Her Hair.
Happy Valentine's Day!!

Friday, 12 February 2010

Little Girl's Hairstyles: Wintertime War Stories

My two kids have been surprisingly healthy this winter, (hallelujah), that is, up until last week. Living where we do, in the dry air and cold, we seem to have more than our fair share of respiratory issues throughout winter. Add in a school age child who picks up every bug hopping around in her classroom, and we usually are keeping the Walmart pharmacy in business.
I've been feeling lucky and grateful lately, and touting how healthy my kids have been. Well, knock on wood, cuz we got a doozy last week. First my 6 year old is down for the count for a week or so, then luckily it got passed on to little sis. So, throughout these last few days filled with nose wiping, medicing-taking coaxing and begging, and Lysol spraying....I've been thinking about some of those special sick times with my kidlets. (Don't get me wrong...I hate that their sick, but I really really enjoy those snuggle times with my babies......when they get big, they don't let you hug and kiss them all day long anymore!)
Like for instance, I remember when my oldest lost it just after drinking a big glass of grape juice all over my new carpet. I found out what carpet cleaner really works on tough stains (Oxi Clean)!
I also remember having to stay home from my sister in law's wedding because one of my babies was sick. That was when I learned to not give my kids fruit snacks when they are feeling nauseous. Those also stain carpet.
And my last soapbox thought.....yesterday, in the midst of my little baby having a raging fever for the 3rd day in a row, I had to be gone all day long. I just felt miserable leaving her behind, even though she was with my husband, and well taken care of, I just ached inside! Even though it's just a long day of throwing out snotty tissues and getting my face coughed on, I love being a mom and taking care of those little stinkers!!

So thanks for letting me share my thoughts here, especially since I want to tell you about a great contest going on at Similisan-who make  products to ease the symptoms of sickie kids. They are running a fun photo contest along with Shutterfly. What do they want? Photos of bright eyed, bushy tailed smiling children that "take your breath away" (in a good way - please no images of your toddler kicking Dad in the crotch). You can enter to win a $500 gift card!! So send in those cute pics (along with some great hairdos!) of your beautiful kids (when the noses aren't running!), and get yourself a gift card!
Above all--enjoy being a mom. There's no higher calling on earth. :)


Similasan and JuiceBoxJungle sponsored me to write this post, and they asked me share this contest with you, and the joys of being a mom during those fun sick times.

Thursday, 11 February 2010

Little Girl's Hairstyles: Braided Headband with Ribbon Video Tutorial

I did this video at the request of a viewer, who saw this style on Princess Hairstyles, one of my favorite hair blogs, and asked if I could recreate it on a video. Well, Lynelle, here's my feeble attempt at this really darling little girl's hairstyle.  Thanks Kori for such a brilliant idea! (And I know the needle part looks scary--I really was not worried in the least that I would poke her...but watching the video makes me cringe an eensy bit myself.)
I also wanted to post this in time for all you super dedicated moms who want to send their little darlings off to school on Friday with proper Valentine's Day party hair!


Wednesday, 10 February 2010

Little Girl's Hairstyles - Daisy Chain Braid with a WAVER 10-15 Min

Here's a zippy and cute do that is doable before school! I did it one morning AND took pictures, and got her on the bus. Sorry abut the bluish tint to my pictures here. My bathroom lights stink for picture taking. But the show must go on...
For this fun and fancy one, I started with a side part back to her crown.
I then angle parted the larger section, and clipped off the middle area. I did spritz these little sections with water before I began my braid.
I did a daisy chain braid down to her ear and put in an elastic.
I did another braid in the middle section, angling towards the same direction as the first.
And then, I got out my WAVER. And yes,  I LOVE it! I found this one in a clearance bin at Ross, and you would have thought I'd found a $100 bill buried in that bin. You see, long ago I had ye old crimping iron (1980 called and wanted it back), and I have since yard saled or DI'ed it, and have regretted it ever since. I didn't love the crimpled look, but I just loved the idea of the crimper. Nice, evenly distributed waves, not induced by an hour and a half of braiding. I've searched high and low for one that I liked (I don't like, I repeat, I don't like using the 3 barrel thingamajig) and was easy to use. SO, I'm telling you all this so that when the day comes and you find your waver buried in a bin, you will be as happy as I was! They are FABULOUS! Here's what Bessie (this is what I've named her since she's so beloved now) looks like:
See the nice deep waves? And it has temperature settings so you adjust it according to the type of hair you are using it on.
To begin waving I parted off her hair into small  sections. I comb the hair out first, and lightly mist that section with hairspray, comb again, and then pick up my first piece to wave.
This waver gets extremely hot, so to protect her little noggin, I place the comb right next to her head when I use the waver up close.
Do each piece evenly, and always spray with hairspray before. This will help keep it in throughout the day. When you have waved all her hair, very lightly comb through from underneath, and only if necessary. If you've combed the piece out beforehand, it shouldn't need much.
And voila!